We’re a helpful bunch at Toast, so here’s our handy guide on how to mark up a PDF.
When we’re working on print or digital documents, we usually send proofs as PDFs. It’s a great way to share the work with our clients for review. But what’s the best way to send us feedback?
Read on for our guide on how to mark up a PDF.
When you open a PDF in Adobe Acrobat you can use a handful of commenting tools to ask your designer to make changes. We call this ‘marking up’. When you send the PDF back, we get a checklist of amendments. And we can work through it one at a time. This makes sure we take care of all your updates. It’s useful, quick and easy.
But it’s important to use the tools correctly. If you don’t, you risk delay and miscommunication.
We hope you find this guide helpful. Why not bookmark it as a useful reference?
How to mark up a PDF
Getting started
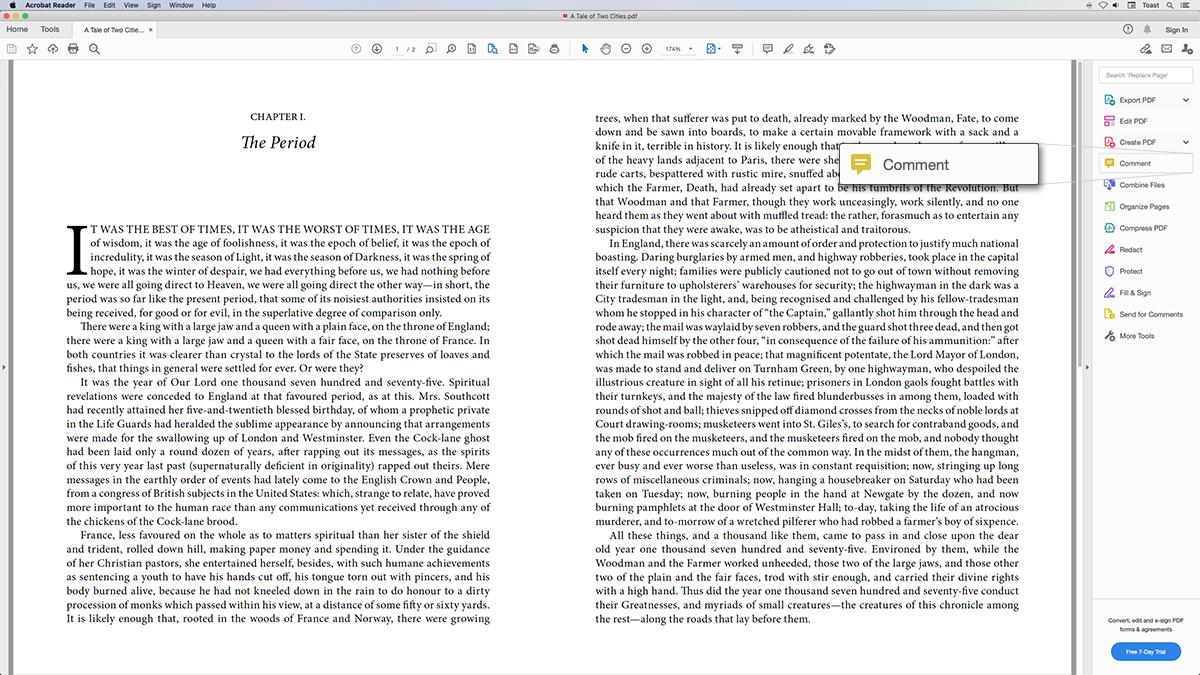
When you open your PDF in Acrobat, you’ll see a panel of tools on the right. If you don’t see it, you can make it visible. Go to the menu at the top of the screen and select View > Show/Hide > Tools Pane.
Click on the Comment button in this panel.
The mark-up tools
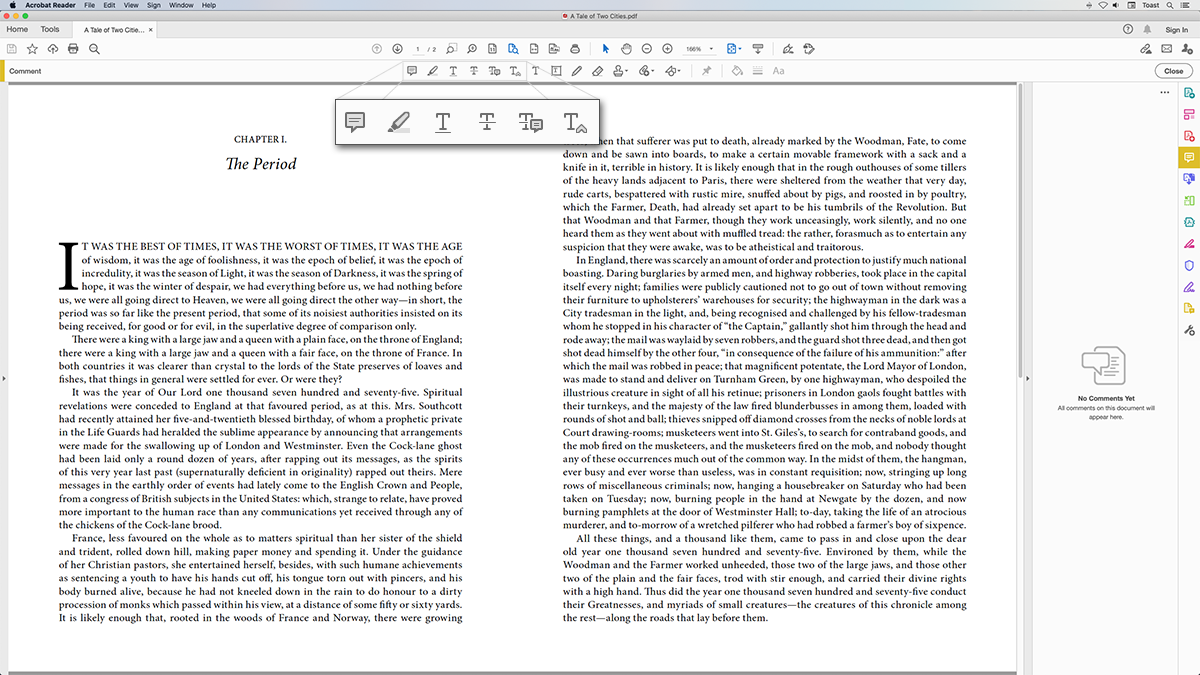
This will make another row of tools appear above your PDF display. There are over a dozen, but don’t worry. You only need the first six to mark up most PDFs.
The Sticky Note tool
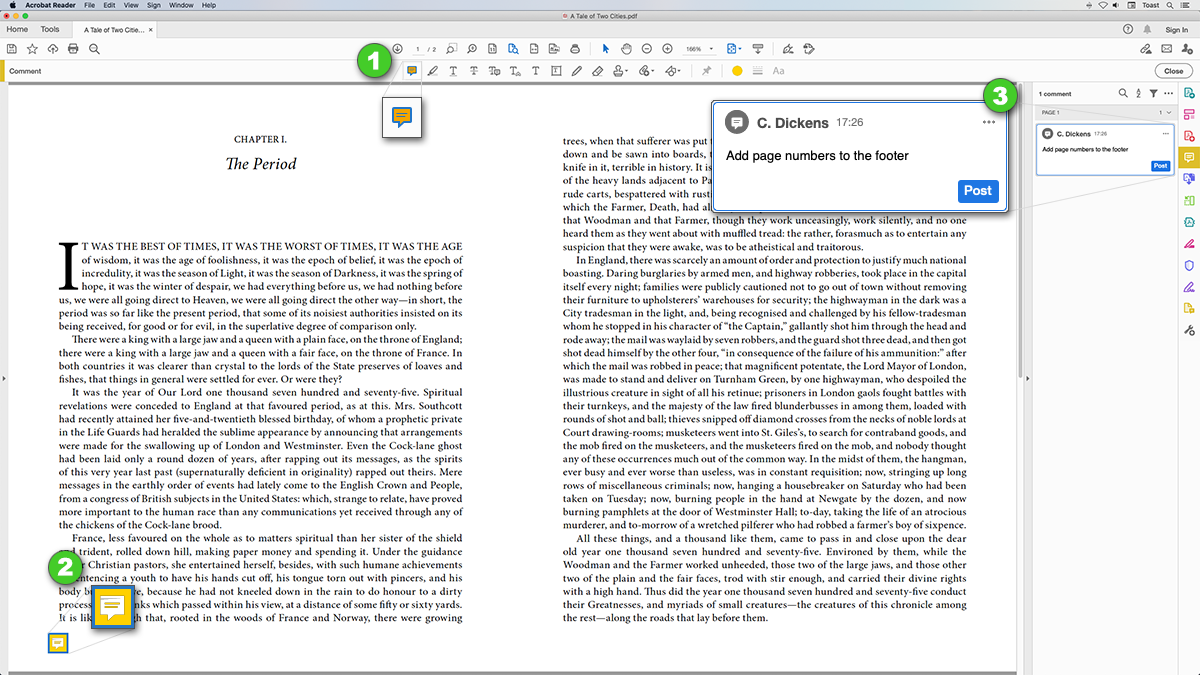
The first tool is the Sticky Note. This tool is for general comments.
- Clicking on the Sticky Note tool turns your cursor into a little speech bubble.
- Move the speech bubble to an appropriate place on the page and click your left mouse button.
- A comment panel appears on the right. Type your comment here and then click the Post button.
The Highlighter tool
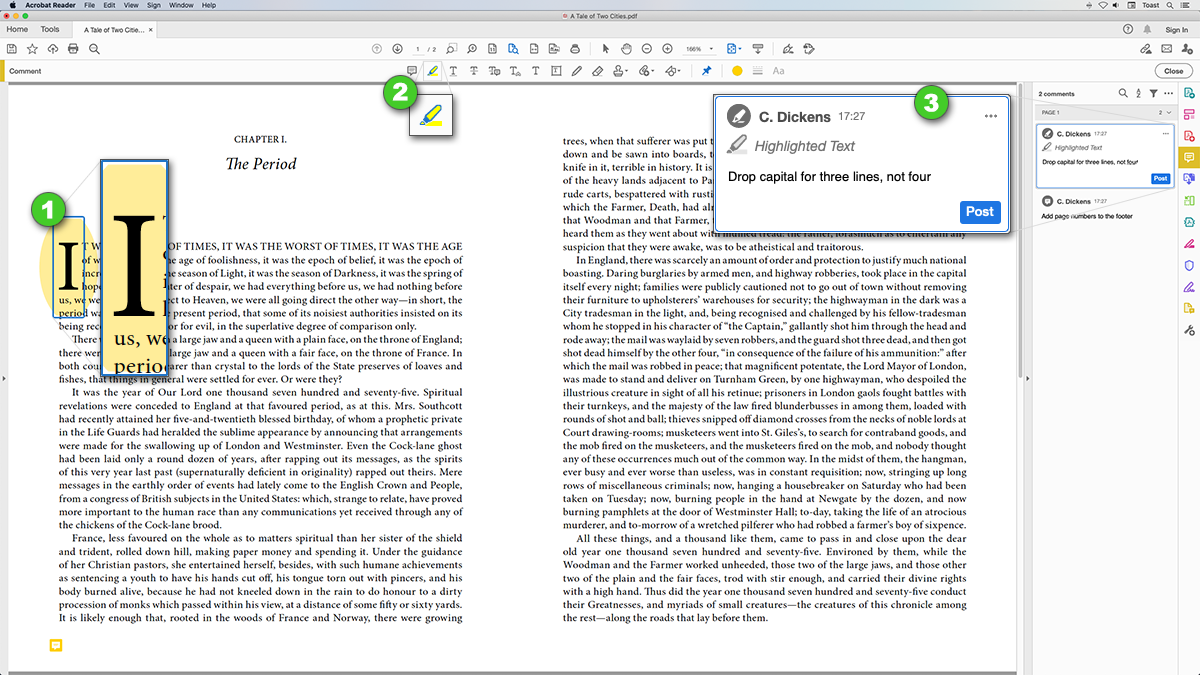
The next tool is the Highlighter. This is for general comments about particular bits of text.
- Select the text you want to highlight by clicking and dragging with your mouse.
- Click on the Highlighter tool to highlight your selection.
- A comment panel appears on the right. Type your comment here and then click the Post button.
The Underline tool
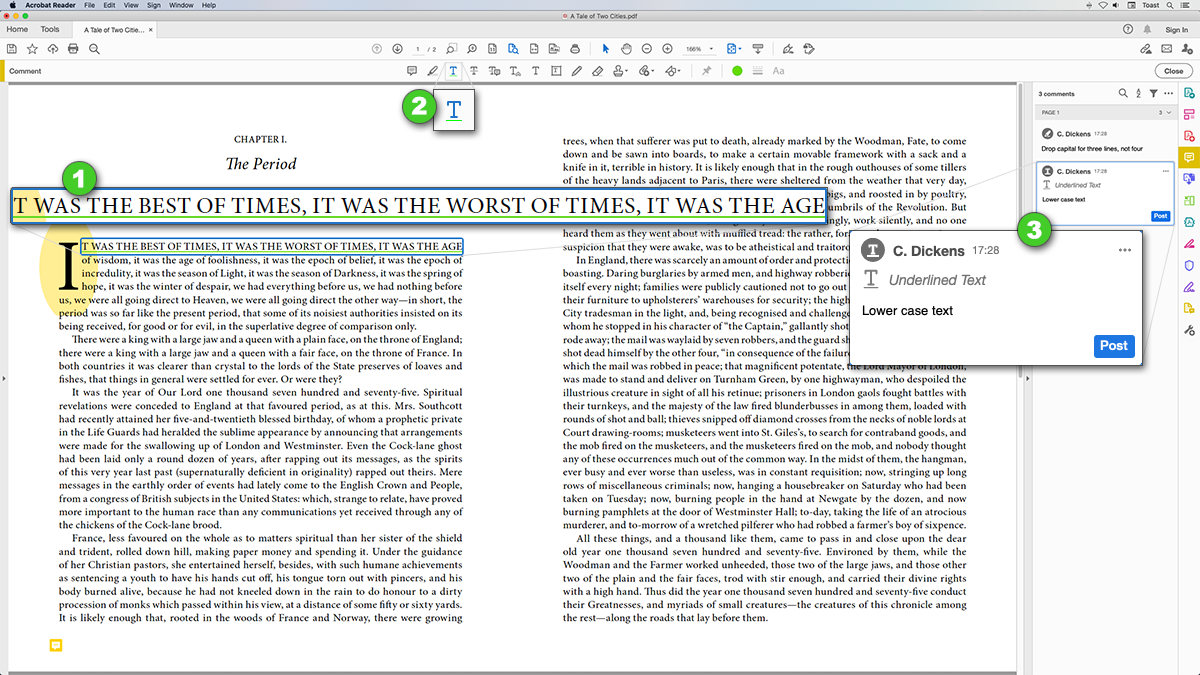
The next tool is the Underline tool. It works in the same way as the Highlighter. But you might prefer it for larger areas of text.
- Select the text you want to underline by clicking and dragging with your mouse.
- Click on the Underline tool to underline your selection.
- A comment panel appears on the right. Type your comment here and then click the Post button.
The Strikethrough tool
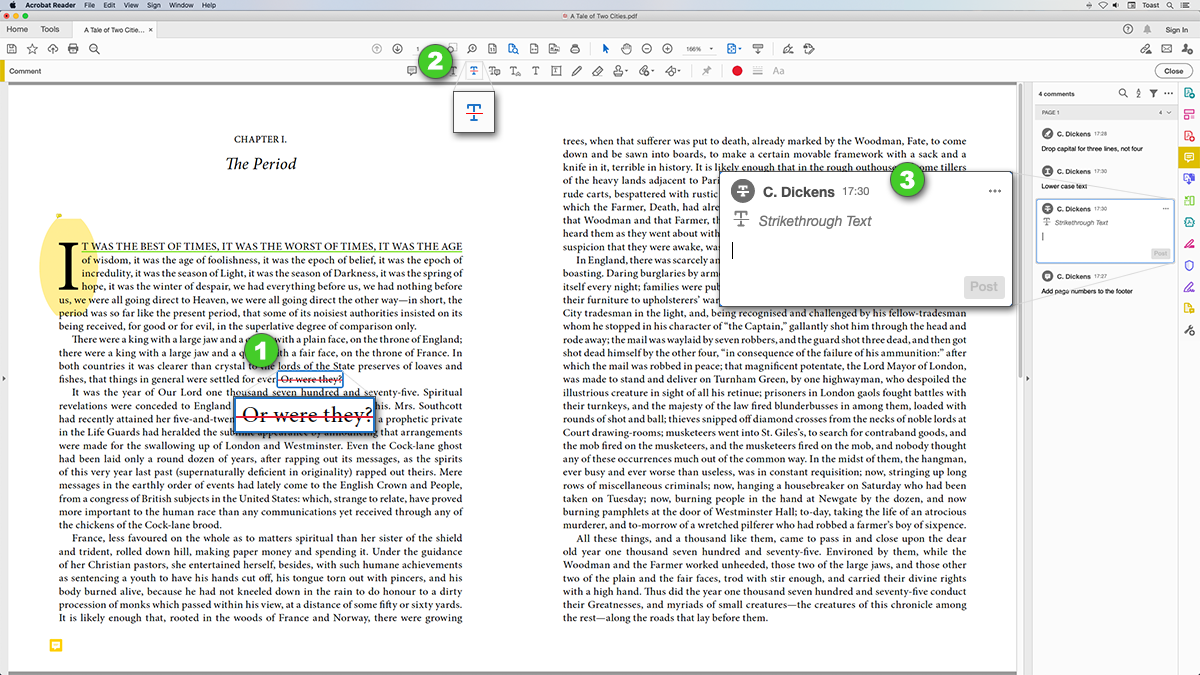
The next tool is the Strikethrough tool. Use this to mark the text you want us to delete.
- Select the text you want deleted by clicking and dragging with your mouse.
- Click on the Strikethrough tool to strike through your selection.
- A comment panel appears on the right. You can type something here if you want your text changed. But it’s better to use the next tool (Replace Text) for this. So, for deletions, use the Strikethrough tool without leaving a comment.
The Replace Text tool
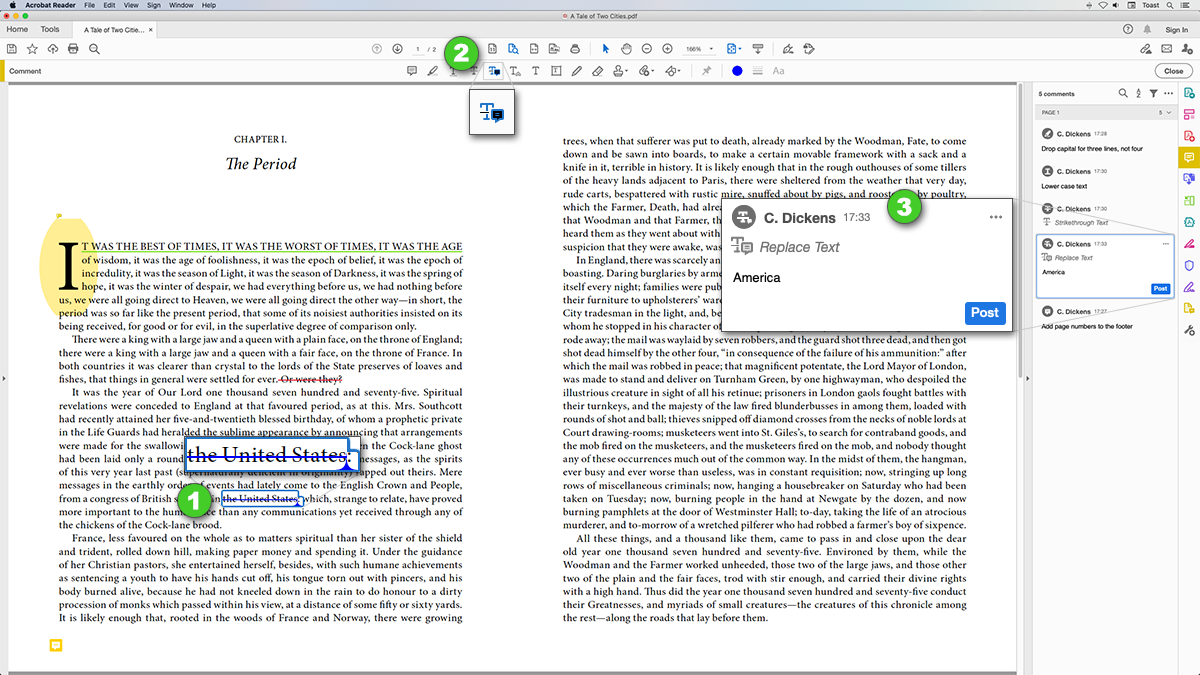
The next tool is the Replace Text tool. Use this to mark the text you want us to change.
- Select the text you want changed by clicking and dragging with your mouse.
- Click on the Replace Text tool to draw a line through your selection.
- A comment panel appears on the right. Type your new text here and then click the Post button.
The Insert Text tool
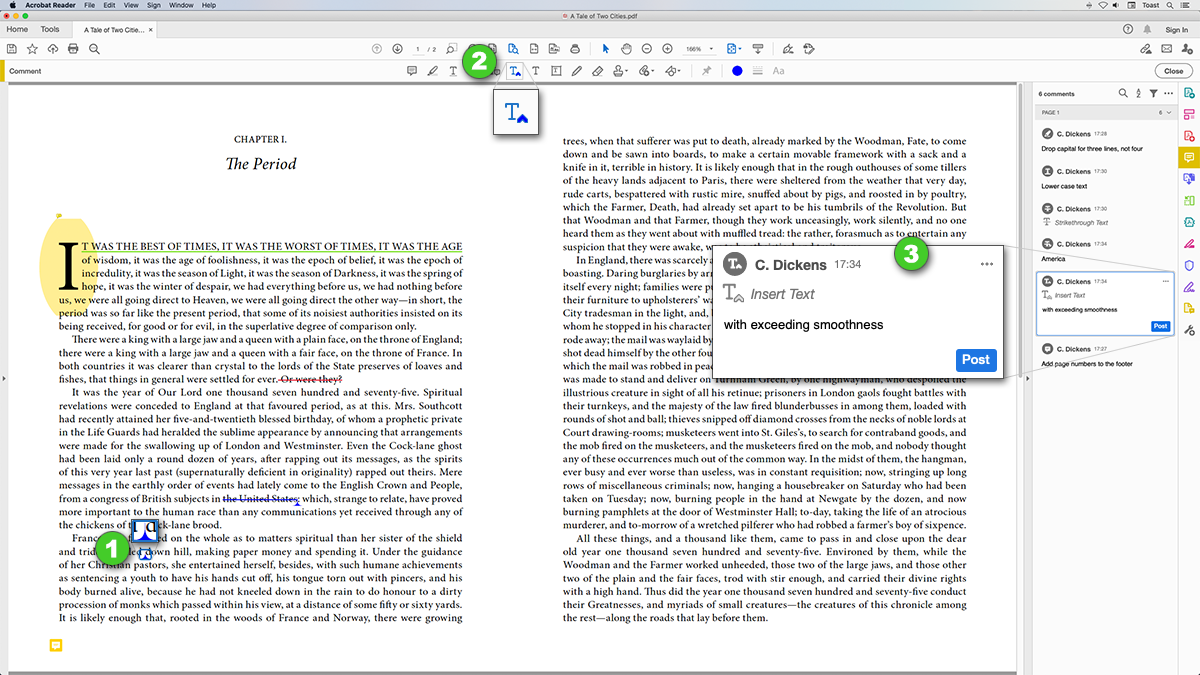
The next tool is the Insert Text tool. Use this to ask us to add new text.
- Click on the place on the page you want the new text to go.
- Click on the Insert Text tool to add an insertion point.
- A comment panel appears on the right. Type your new text here and then click on the Post button.
Finishing up
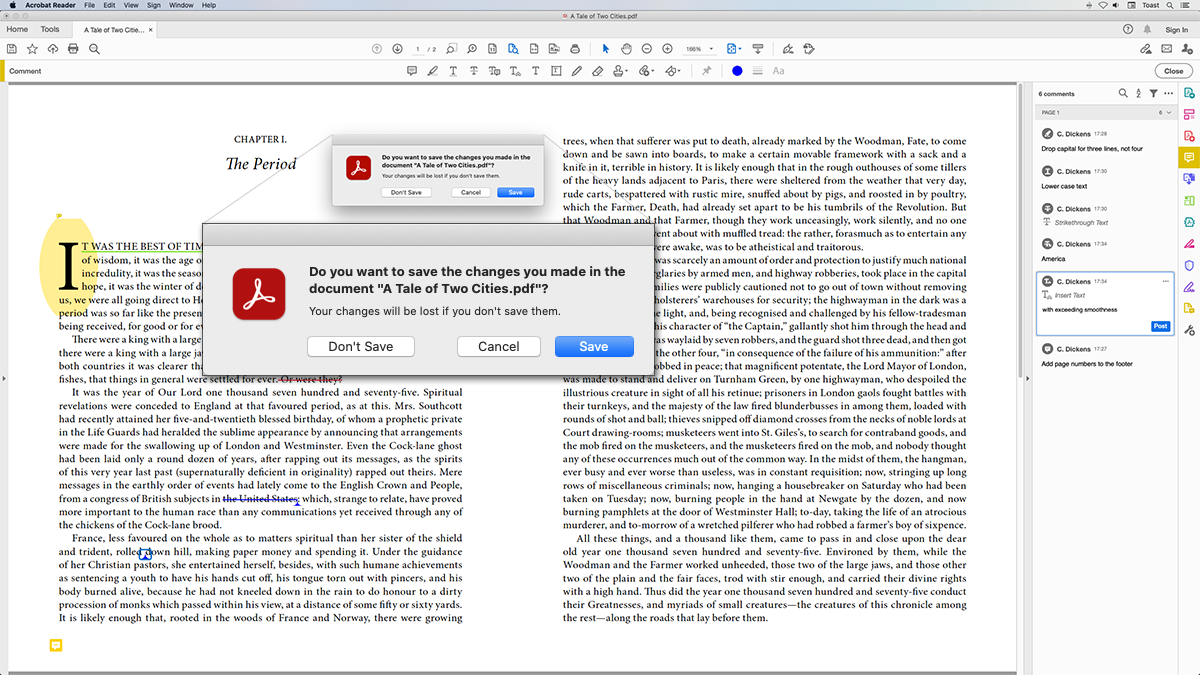
When you’ve finished your markups, you can close the PDF. But don’t forget to save it first. If you want to save it with a different file name, use the top menu to select File > Save As… Then, you can email it back to us, and we’ll take care of your amendments.
Conclusion
So there you have it. The foolproof guide on how to mark up a PDF. Remember, marking up your PDF as above will help your project run smoothly. Let us know if you have any questions. We’re always happy to help.
